Overview
Guest users, also known as external users, are non-registered nVX users. Non-registered users of nVX are given a default set of permissions and privileges.
Inviting Guest Users
There are 4 ways of inviting guest users to the meeting:
- Schedule a meeting via the User Portal
- Add guest user(s) into an active meeting
- Schedule a meeting via the nVX Outlook Plugin
- Add via nVX Mobile Apps (Android/iOS)
Schedule Meeting from User Portal
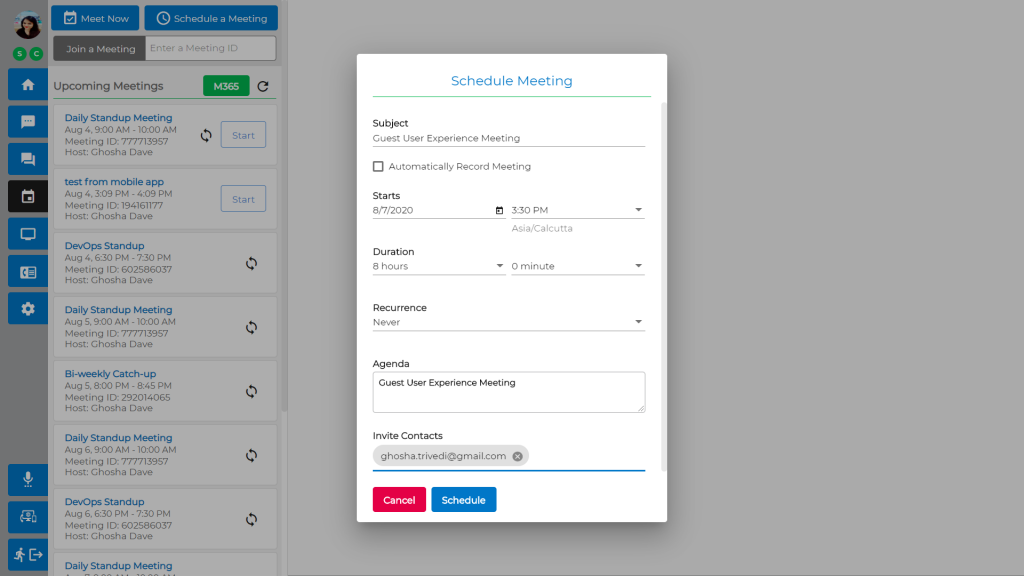
A meeting host can invite guest user(s) to the meeting while scheduling it in the User Portal.
- Click on Schedule Meeting from the User Portal
- Enter the meeting details and contacts to be invited
- Enter the guest user’s email address and press the Tab key. Note: Make sure to use the Tab key after entering the guest email address otherwise the guest will not receive the meeting invitation.
Add to Active Meeting
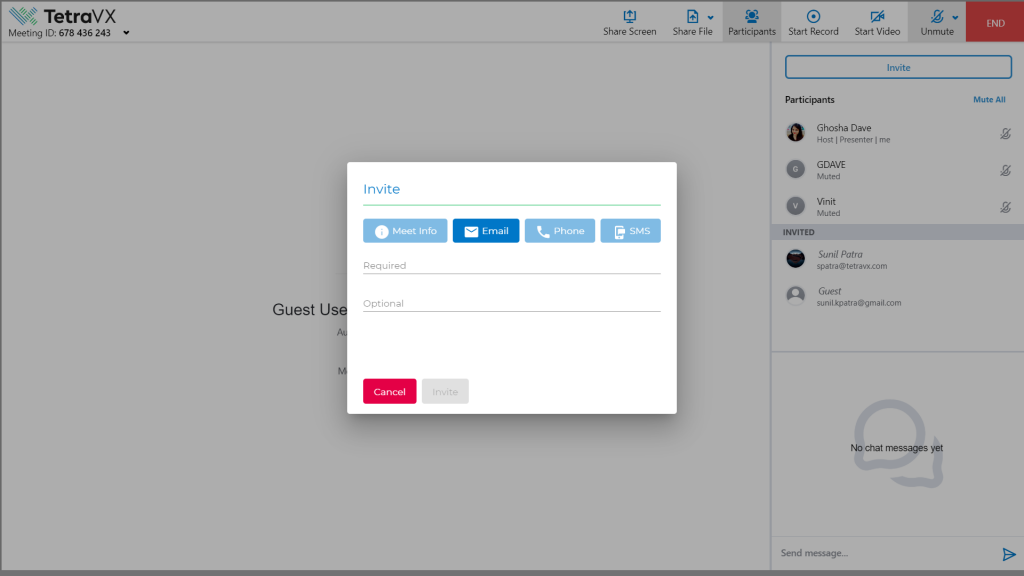
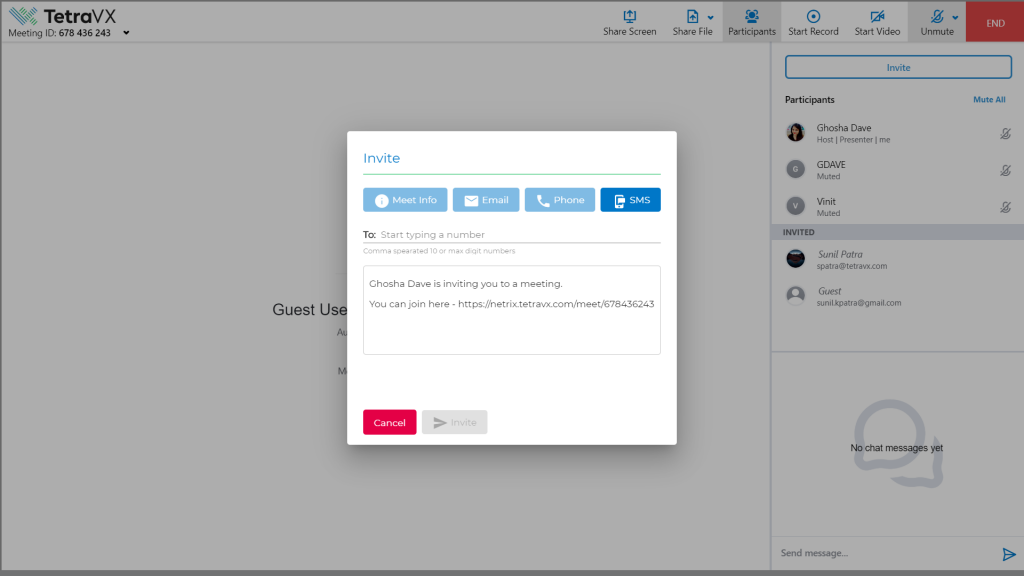
If a meeting has already been started, a host or participant can invite a guest user immediately using the invite button.
Invite via Email
Enter the guest users’ email address and press the tab key. Click the Invite button to send the email invitation. Click the Cancel button to cancel the meeting invite.
Invite via Meeting Info
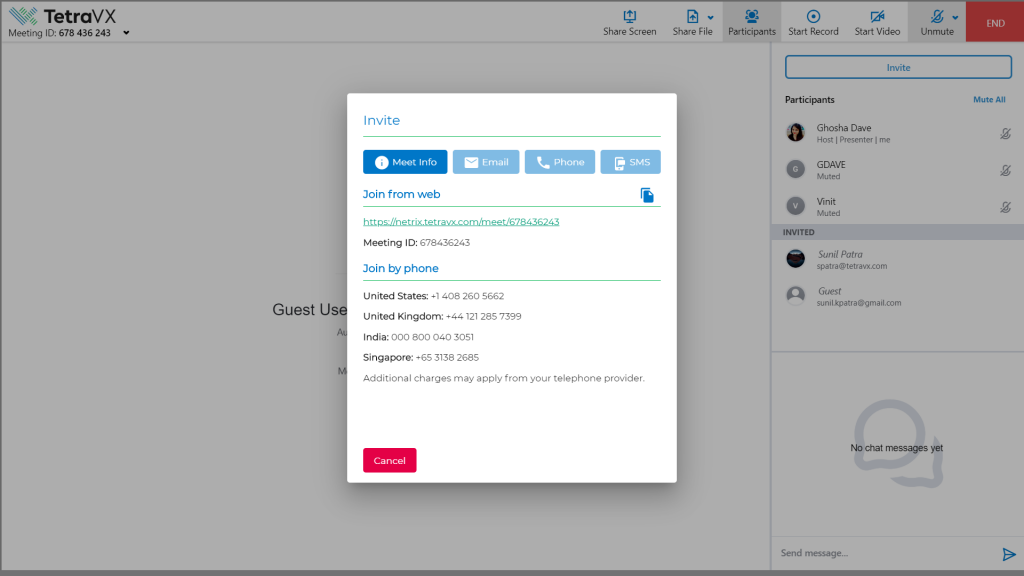
Guests can be invited by sending the meeting details. Click on Copy button and paste to users. They can join meeting via suitable method:
- Meeting URL – Click on meeting URL to directly enter Meeting (Registered users and Guest users)
- Meeting ID – Open User Portal and enter Meeting ID to join the meeting (Registered users only)
- Join via Phone – Dial in any of the suitable number and follow the instructions.
Invite via SMS
Click on SMS tab and enter a 10-digit mobile number to send meeting URL via SMS.
Schedule Meeting from nVX Outlook Plugin
A meeting host can invite guest user(s) to a meeting while scheduling the meeting through Outlook via the Outlook Plugin.
Add via nVX Mobile Apps (Android/iOS)
A meeting host can invite guest user(s) to a meeting while scheduling the meeting through the nVX Mobile Apps. Hosts can also add guest users to live meeting via the Mobile App following the same format as the User Portal.
Join Meeting as Guest User
Join through Email Invitation
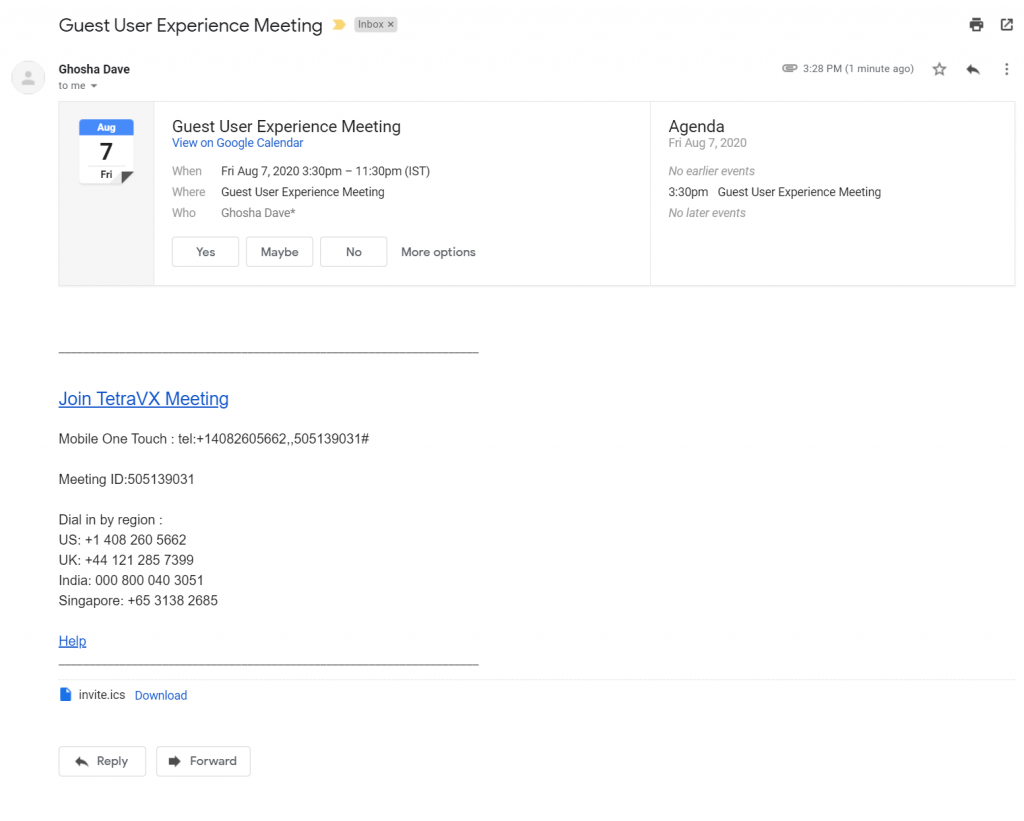
External users will receive an email with following details in the email body when invited by a meeting Host. Guest user(s) can select the suitable method to join the meeting; Dial in or click the link to join in a single click via nVX User Portal.
Logging in as a Guest
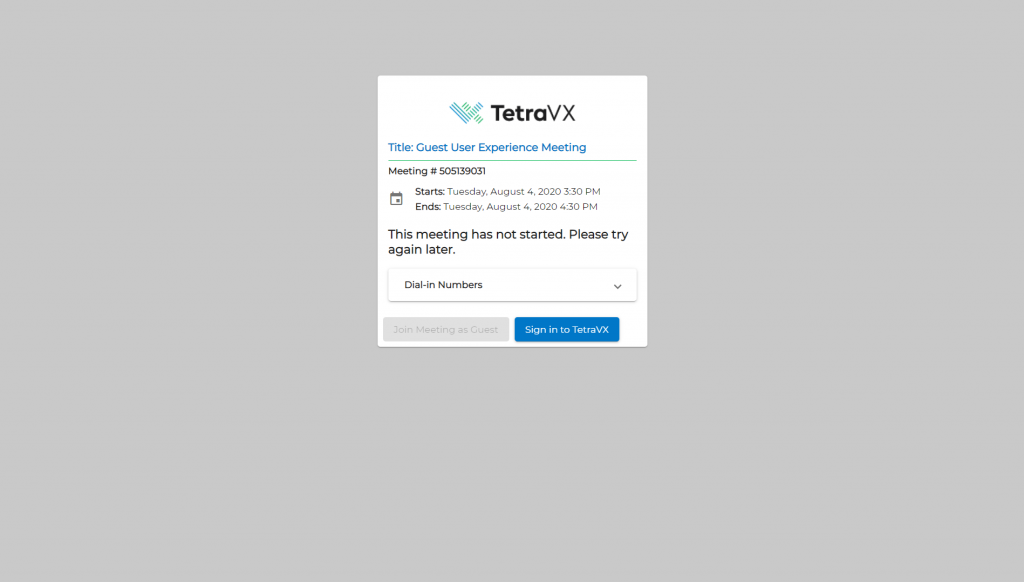
Upon joining a meeting, the guest user will be asked to login. Because the user is unregistered, they must select Join Meeting as Guest. If the meeting host has not started the meeting yet, the Join Meeting as Guest button will not be selectable.
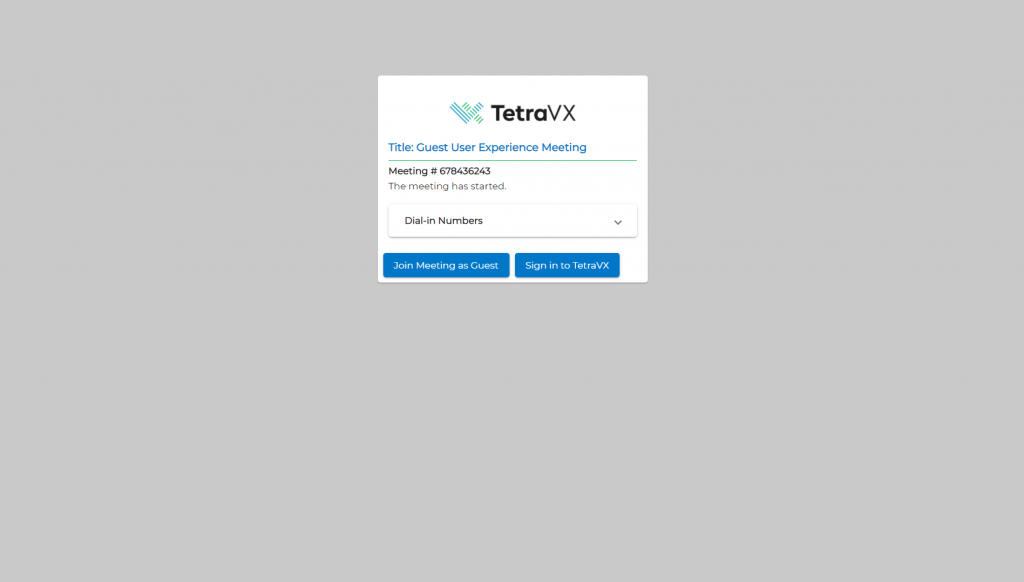
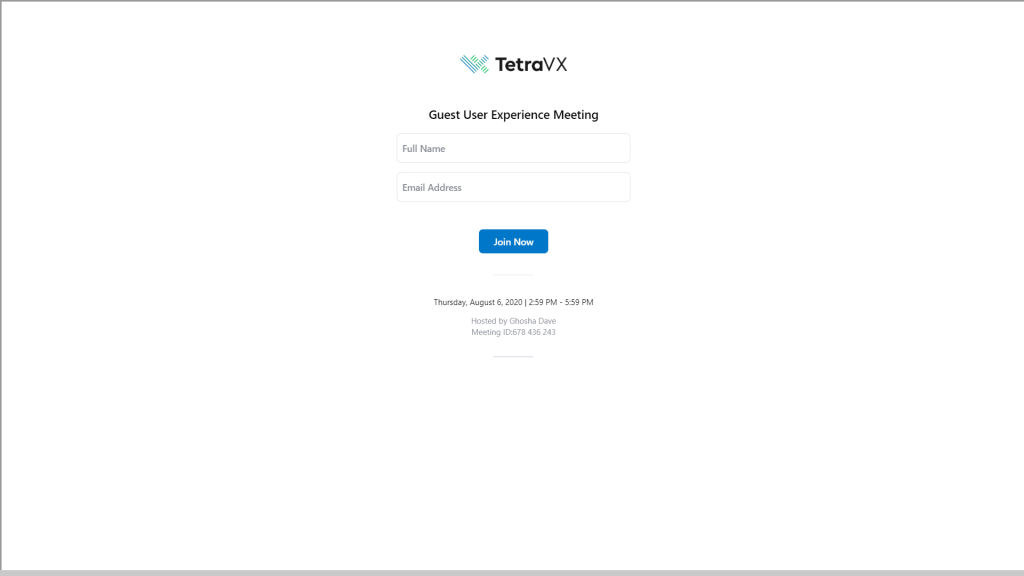
Guest users will then be prompted with a splash page asking them to enter their name and email address. Once both are entered, click the Join Now button to join the meeting.
After logging in successfully, guest users will be directed to the live meeting.
Feature Limitation for Guest users
Guest cannot start a meeting
Guest users are not allowed to start a meeting. They can enter meeting only if meeting is started by Host or any other participant. If meeting is not started, guest user login will not be available.
Guest cannot invite others
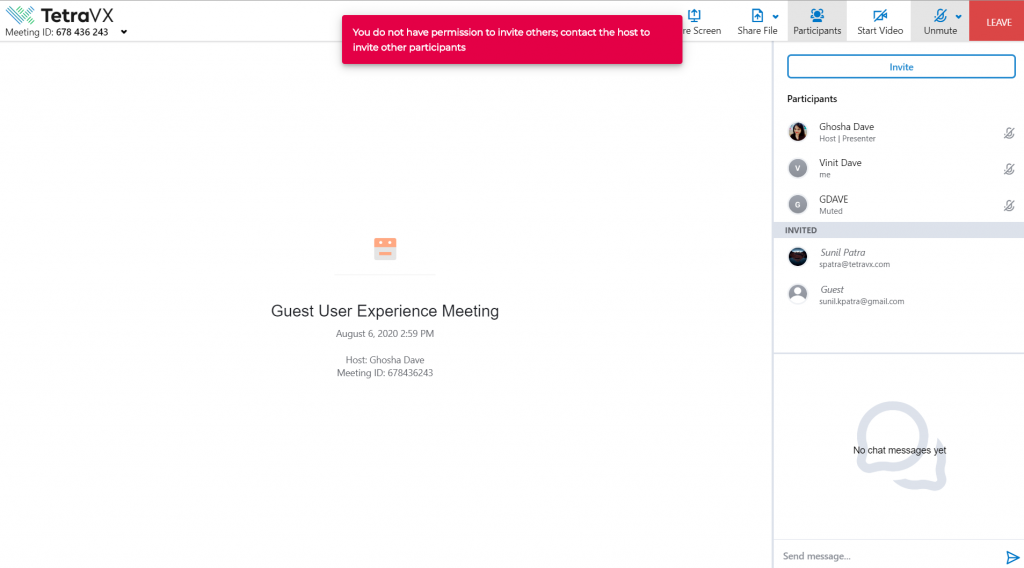
Guest users are not allowed to invite other participants. They will get following popup.
