
Scheduling a Meeting allows users to invite participants to a future video or audio conference bridge.
Step 1
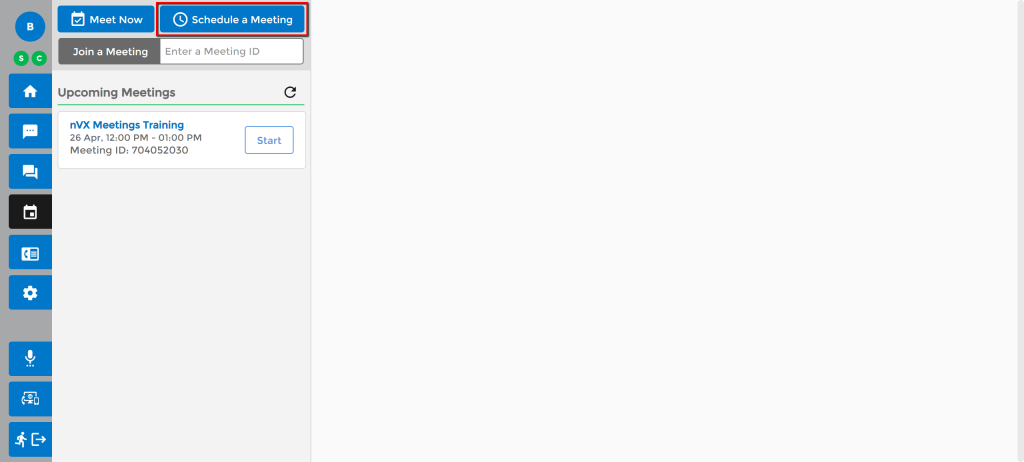
Navigate to the Meetings page of nVX by selecting the calendar icon from the left navigation panel. ![]()
Step 2
Select the ‘Schedule a Meeting’ button from the nVX Meetings page.
Step 3
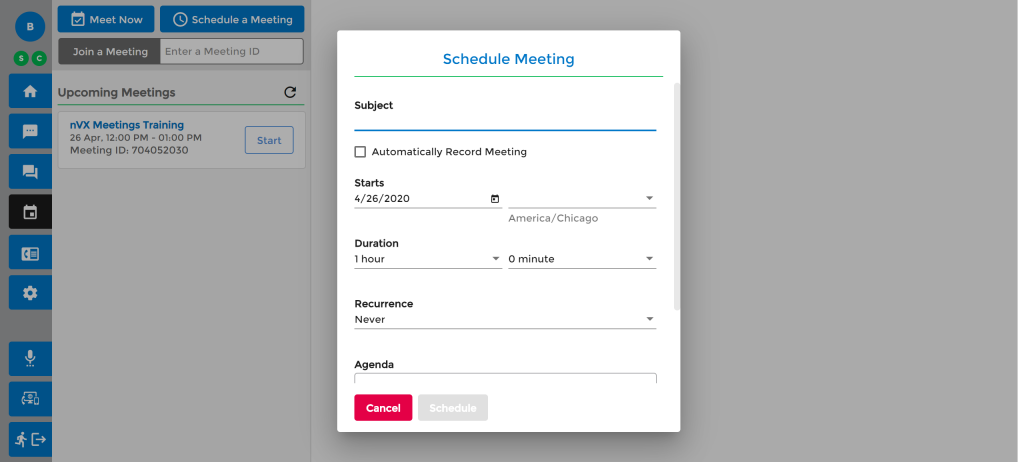
Complete the meeting details to schedule the meeting. Meeting details include:
Subject: Enter meeting subject, this is the meeting title that will appear in your calendar and to guests
Automatically Record Meeting:
- If enabled, the meeting recording will start automatically when the meeting begins
- If disabled, the meeting will not be recorded
Starts:
- Enter the date of the meeting by either typing the date of the meeting or selecting from the calendar view
- Select the time the meeting will begin from the dropdown
Duration: Enter duration by selecting the hours and minutes from the available dropdowns
Recurrence: Select how often you want the meeting to occur from the available dropdown. Options include:
- Never
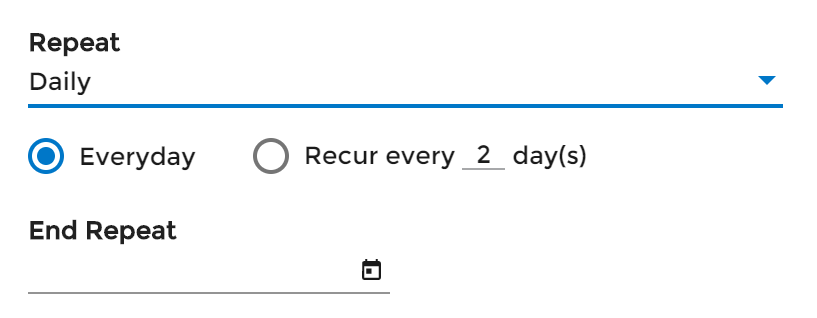
- Daily:
- Everyday: Select Everyday if the meeting is going to be held daily at fixed time and duration.
- Recur every_day(s): Enter the number of fixed days between your reocurring meetings. Users will be allowed to enter 1-30 day(s).
- End Repeat: Enter the date when the reocuring meetings should end.
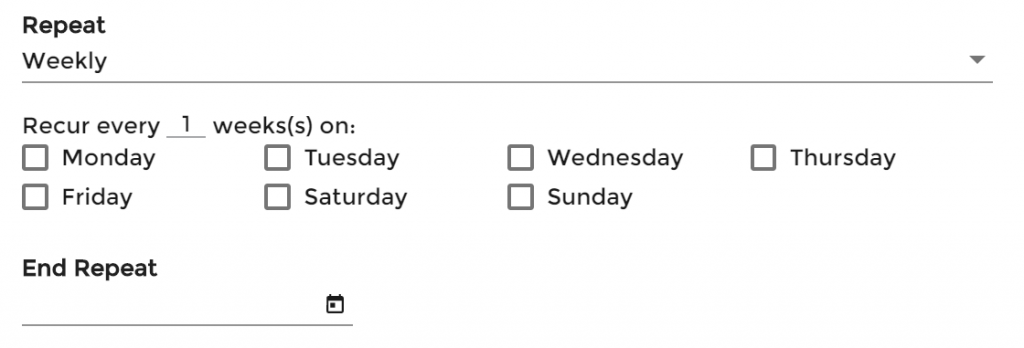
- Weekly:
- Recur every_weeks(s): Enter the number of fixed weeks between your reocurring meetings.
- Select the day of the week the reocurring meeting should occur on
- End Repeat: Enter the date when the reocuring meetings should end.
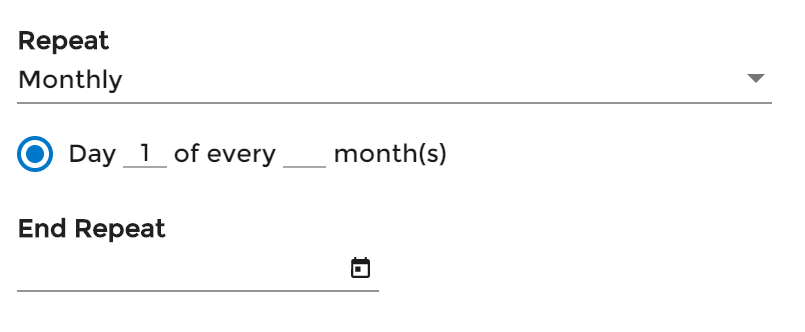
- Monthly:
- Day_of every_month(s): Users can enter 1-30 for which day of each month the meeting should occur on and monthly increments
- End Repeat: Enter the date when the reocuring meetings should end.
Agenda: Enter the agenda or description for your meeting. The Agenda field allows you to include meeting details that will be sent to your meeting participants
Invite Contacts: Invite your meeting participants to the scheduled meeting by either typing their name or email address
- If adding contacts from your Company Directory, available contacts will populate as you type. Select the contact from the populated list
- If adding contacts from outside of your Company Directory, type the email address of the contact you’d like to add and click the Tab key
- To remove a contact from your ‘Invite Contacts’ list, select the X ,
 , icon next to the contacts name or email
Step 4
Select the Schedule, ![]() , button to schedule the meeting.
, button to schedule the meeting.
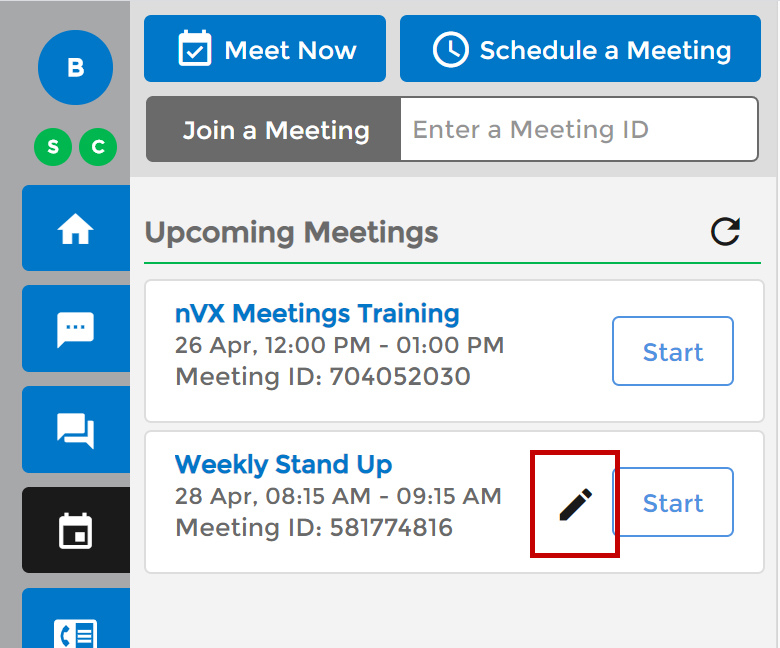
List of Upcoming Meetings
Users can see a list of all upcoming scheduled meetings under the Upcoming Meetings view. Available meetings will include details such as Meeting Subject, Date, Time, Duration, Meeting ID, and a Start or Join button.
- Start: If the user is the host of the meeting, a Start button will appear
- Join: If the user is a paricipant of the meeting, a Join button will appear
Editing and Deleting Scheduled Meetings
Step 1
To edit or delete a scheduled meeting, hover over the upcoming meeting and select the edit icon from the list of Upcoming Meetings.
Step 2
The meeting details window will open, allowing users to edit the existing meeting information or delete the meeting from occuring.

Note: Only Hosts can edit the meeting.