Overview
A queue callback is a flow option presented to a caller waiting in a queue. After waiting a specified length of time, the caller can choose to receive a callback from an Agent instead of waiting on the phone. When the callback request is received, based on the configured parameters, an outbound call is placed to the customer.
The Queue Callback feature is very flexible. Managers can choose to activate it and deactivate it simply by following the steps below and the changes will apply in seconds. Thus, they can manually activate it when a call volume or KPI threshold has been reached, during seasonal rushes, on days with expected heavy call volume and when they are short-staffed. This can be an invaluable tool to help keep customers happy and your team efficient during periods of high call volume.
Benefits of Queue Callback
Increase customer satisfaction and retention
Let callers know you value their time by giving them the ability to opt out of your queue and be called back later. Nobody likes a lengthy wait. With this new feature, your customers will no longer have to wait in lengthy queues. Instead, they can wait for an Agent to call them back. Customers will love the company even more when they know that they never have to lose time waiting in a queue.
Decreased caller abandonment
When your callers have the option to request a callback, they will no longer be tempted to hang up and move on forever. Instead, they can request a callback and go about their day while they wait for an agent to return their call.
Never lose a lead
With this new feature, your agents can easily handle every lead that comes their way. As soon as the caller requests a callback, nVX will record their information in their customer profile and y agents can contact the lead as soon as they are free. Agents will never lose a lead again because they were too busy, could not answer their call in time or lost their contact information.
How Callback Works
When a call is made but there are no available Agents, the caller will be sent to a waiting queue. Once in the waiting queue, the first message they hear will be the Queue Callback Message allowing them the option to continue to wait in the queue or request a callback. An example of a callback prompt is: “It appears that all our agents are currently busy. If you wish to receive a call back when the next agent is available, Press 1, or to stay on hold, press any other key.”
How to Configure Queue Callback
To set up Queue Callback:
- Login
- Create Callback profile
- Managed Queues
- Execution Slots
- Offered Slots
Login
Login into nVX Admin Portal with the Admin/SuperAdmin credentials. Select Contact Center from the available Apps. Once selected, admins will be redirected to ICX Contact Center Manager.

Create Callback Profile
To setup Callback feature, click on. Open Callback profile from CC Callback section.
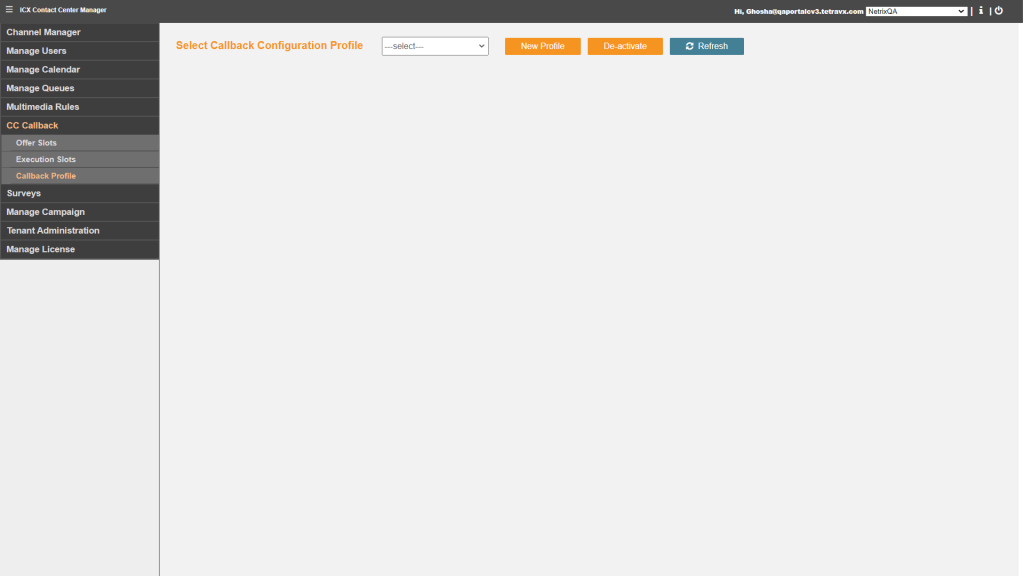
Admin will have following options:
- New Profile – Create new Callback Profile
- De-activate -Deactivate Callback profile
- Refresh – Refresh UI
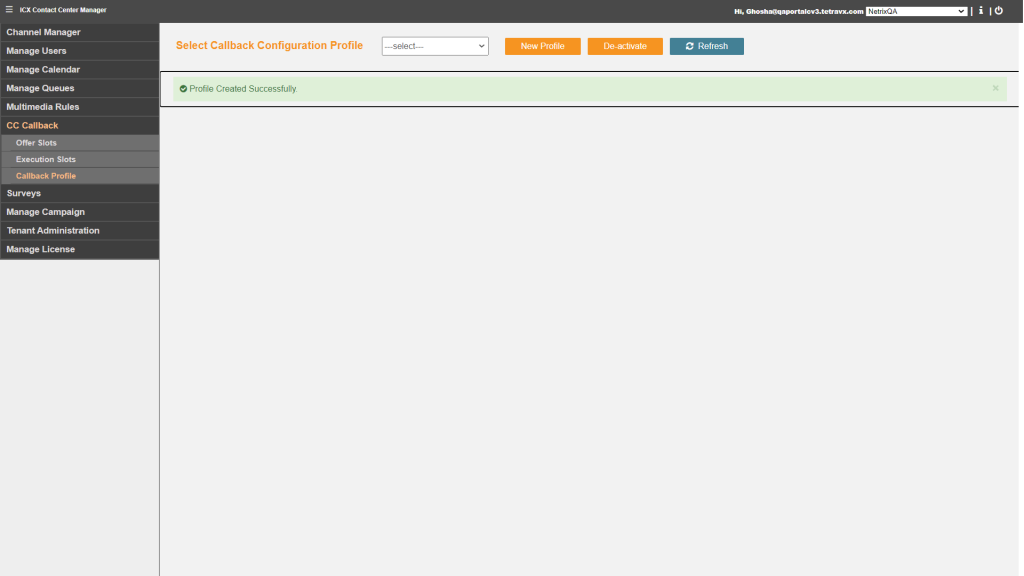
Click on New Profile button, enter Callback profile name and click on Create button.
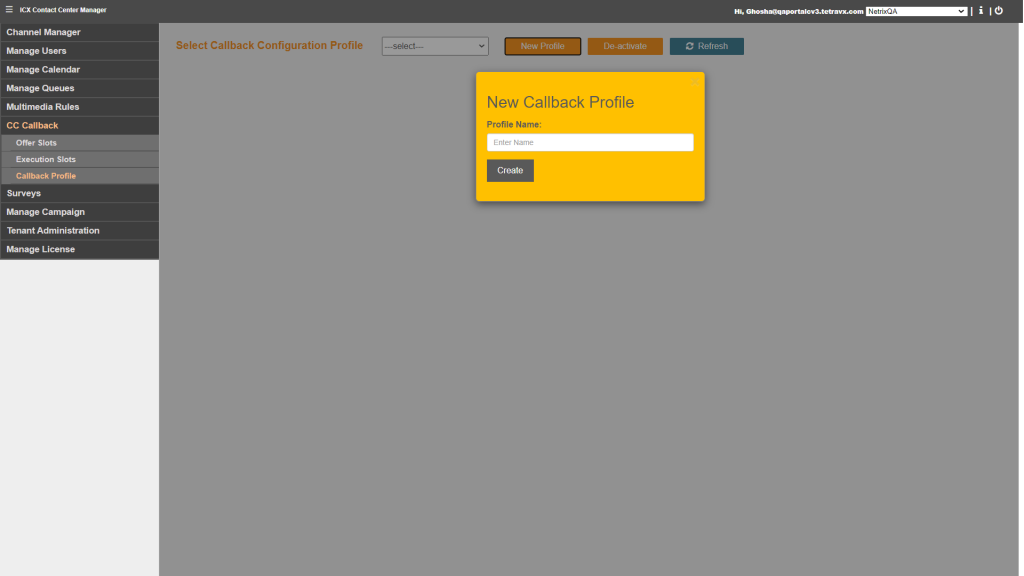
Once profile is created successfully, UI will show confirmation message – “Profile Created Successfully”
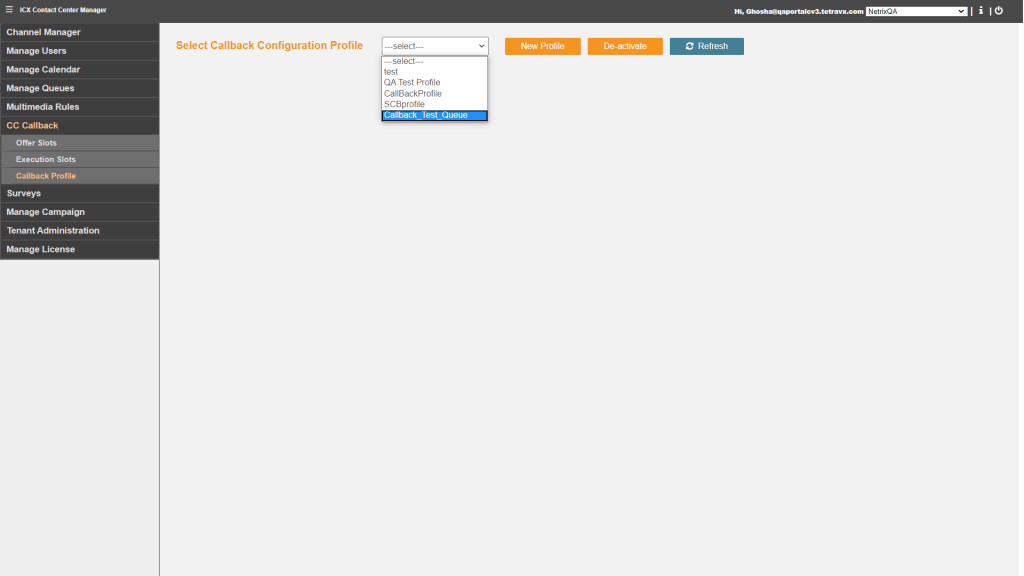
After creating profile successfully, Open the Profile form drop down.
Callback Configuration Profile
After selecting Profile, Callback configuration page will be opened for Queue Callback settings.
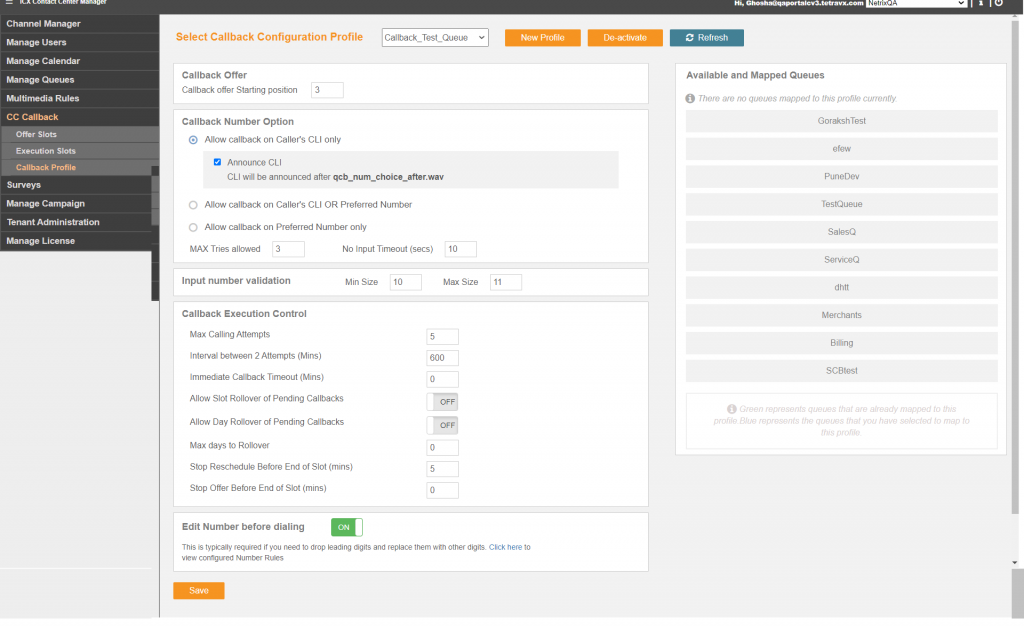
Callback Offer Starting Position
Callback will be offered to only those callers that are waiting in the queue at this position or later.
Callback Number Option
- Allow callback on Caller’s CLI only
- Announce CLI – CLI will be announce after selected prompt
- Allow callback on Caller’s CLI OR Preferred number
- Announce CLI after selected prompt
- Announce Number entered and ask caller for confirmation – if enabled, system will announce number entered by caller and ask confirmation input.
DTMF 1 is auto assigned as confirmation, so word your announcement accordingly
- Allow callback on Preferred number
- Announce Number entered and ask caller for confirmation – if enabled, system will announce number entered by caller and ask confirmation input.
DTMF 1 is auto assigned as confirmation, so word your announcement accordingly
- Max Ties allowed – max attempts provided to the caller to provide a valid input while requesting a callback
- No Input Timeout – amount of time Callback application will wait for the caller to provide a DTMF input
Input Number Validation
- Min Size – least number of digits that a preferred callback number must have for it to be considered a valid number in this profile
- Max Size – max number of digits that a preferred callback number can have for it to be considered a valid number in this profile
Callback Execution Control
- Max Calling Attempts – maximum number of times the callback system will attempt to reach the caller after the first execution. An attempt is counted only when the caller cannot be reached.
- Interval between 2 Attempts (Mins) – amount of time interval to maintain between 2 callback attempts
- Immediate Callback Timeout (Mins) – if an immediate callback cannot be executed within this time, system will retire the callback
- Allow Slot Rollover of Pending Callbacks (ON/OFF)
- Allow Day Rollover of Pending Callbacks (ON/OFF)
- Max days to Rollover – These are maximum number if days a callback will be rolled over if it cannot be completed
- Stop Reschedule Before End of Slot (mins) – Stops scheduling a callback in current execution slot X minutes before the end of slot, where X is the interval configured in minutes
- Stop Offer Before End of Slot (mins) – the interval configured here will be the amount if time before the end of an offer slot when the engine will stop offering callbacks if the execution strategy of the slot is Immediate.
Edit Number before dialing (ON/OFF)
This is typically required if you need to drop leading digits and replace them with other digits. Click here to view configured Number Rules.
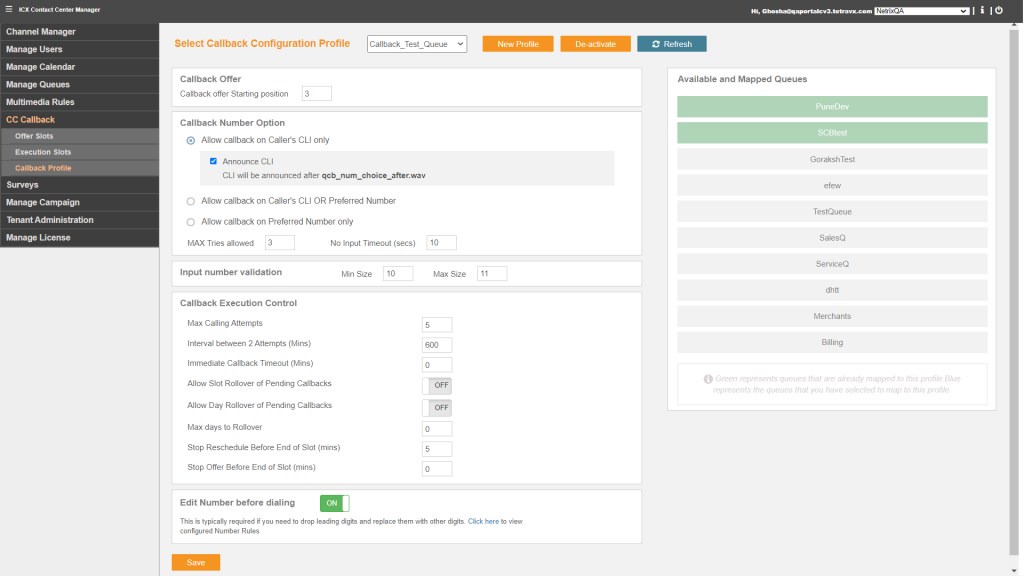
Available and Mapped Queues
Assign Callback profile to Queue through drag and drop. Mapped Queues will be highlighted.
Manage Queues
Now go to Manage Queues and open Configure Queues.
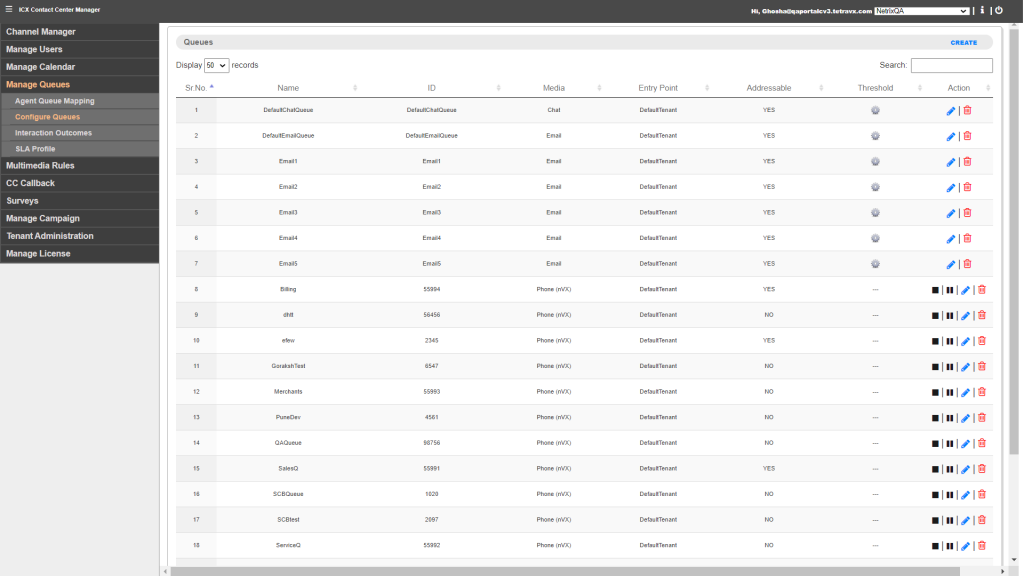
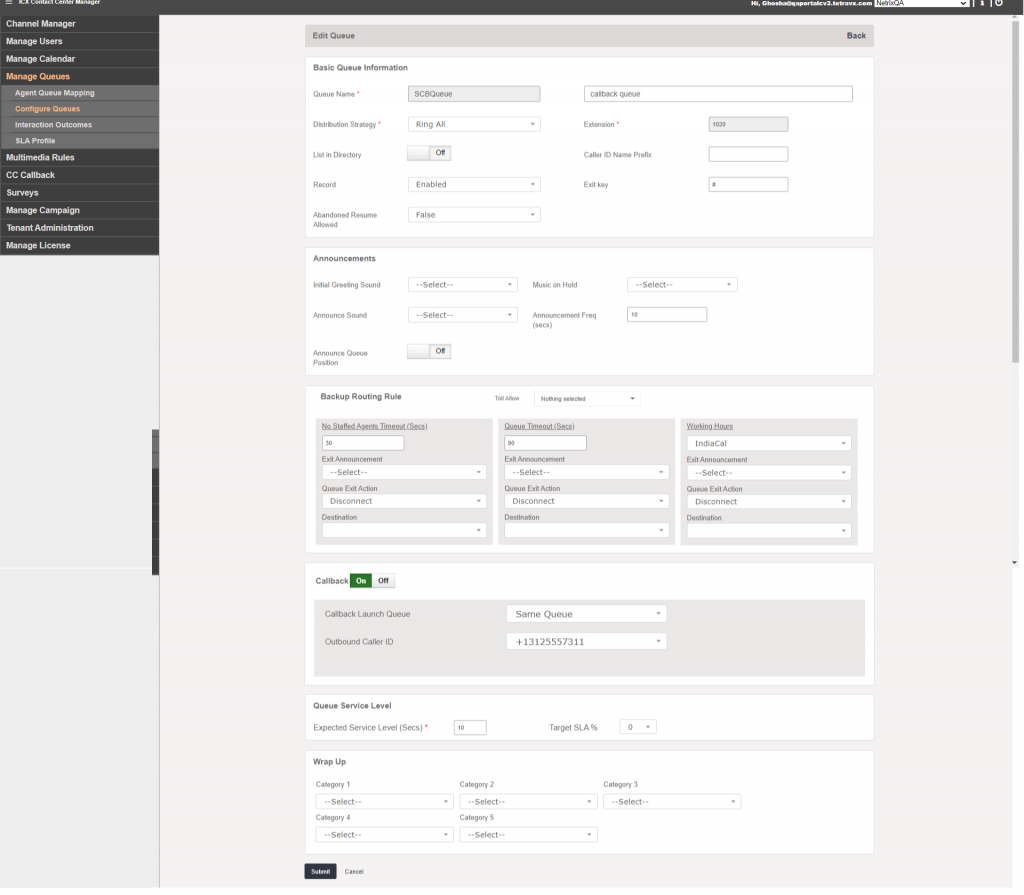
Open Queue for which you want to enable callback feature by clicking on blue colored pencil icon.
- Callback – Scroll down the page, you will see the option to enable/disable Callback feature.
- ON – Callback feature will be enabled with the selected callback profile.
- OFF – Callback feature will be disabled
- Callback Launch Queue
- Same queue – Agent of the same queue will call back to caller
- Select another queue – Agent of selected queue will call back to caller
- Outbound Caller ID – This caller ID will be displayed to caller
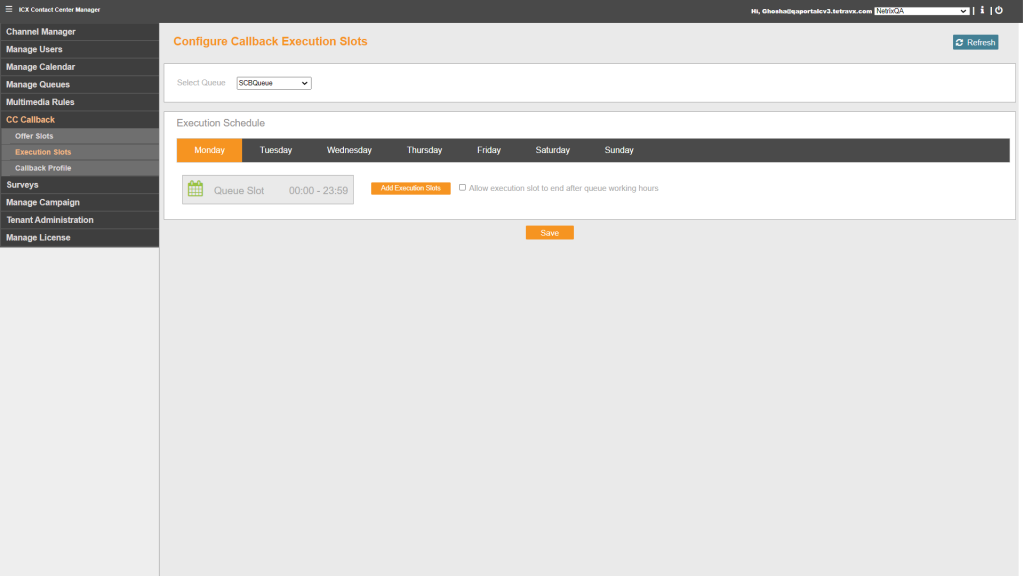
Execution Slots
Now go to CC Callback and open Execution Slots. This section is to configure Callback feature execution duration on each day.
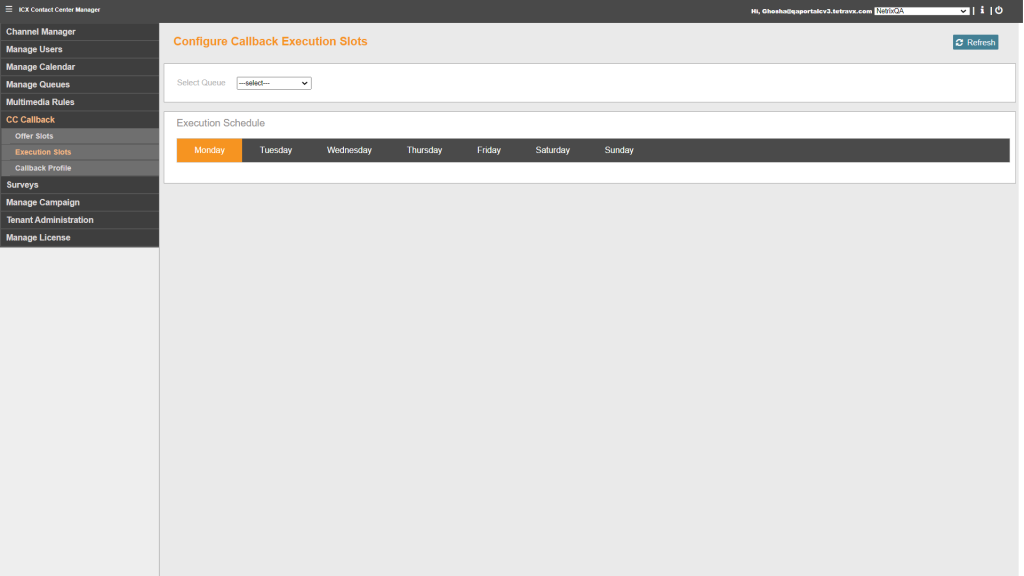
Select Queue from the drop down for which you want to set Callback execution slots.
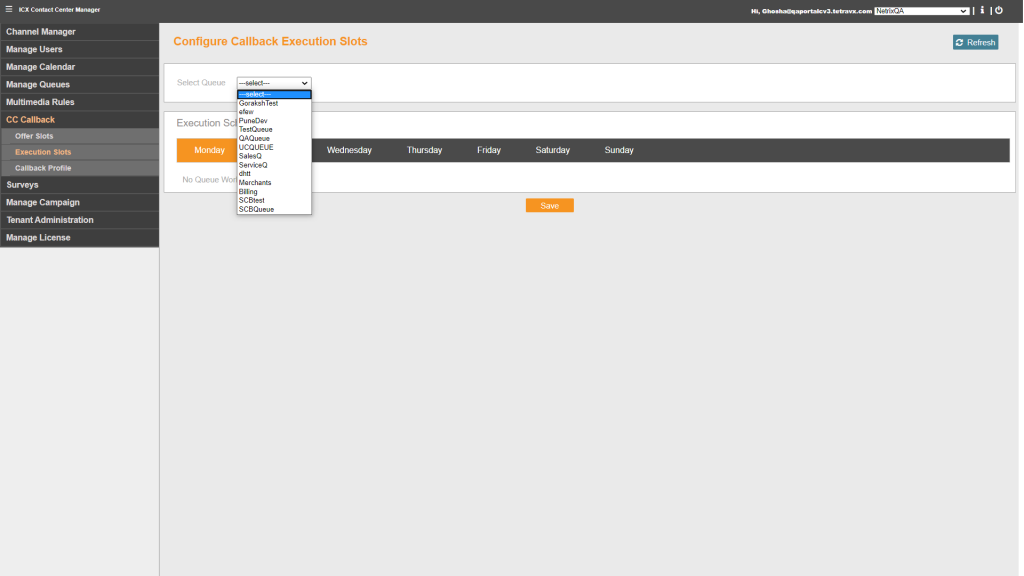
Click on Add Execution Slots button and set slot. This slot will be allocated to call back the caller who has requested for callback.
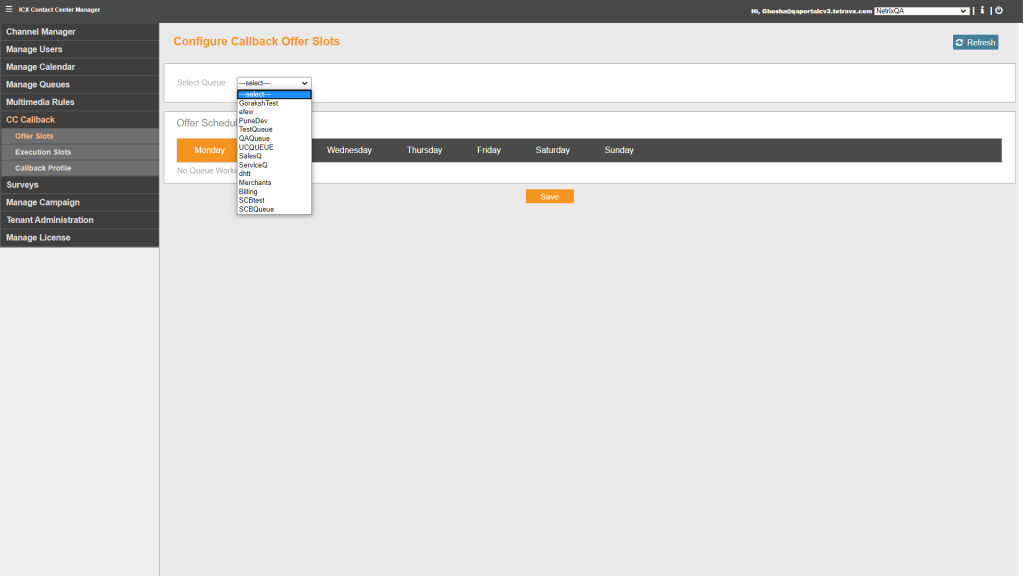
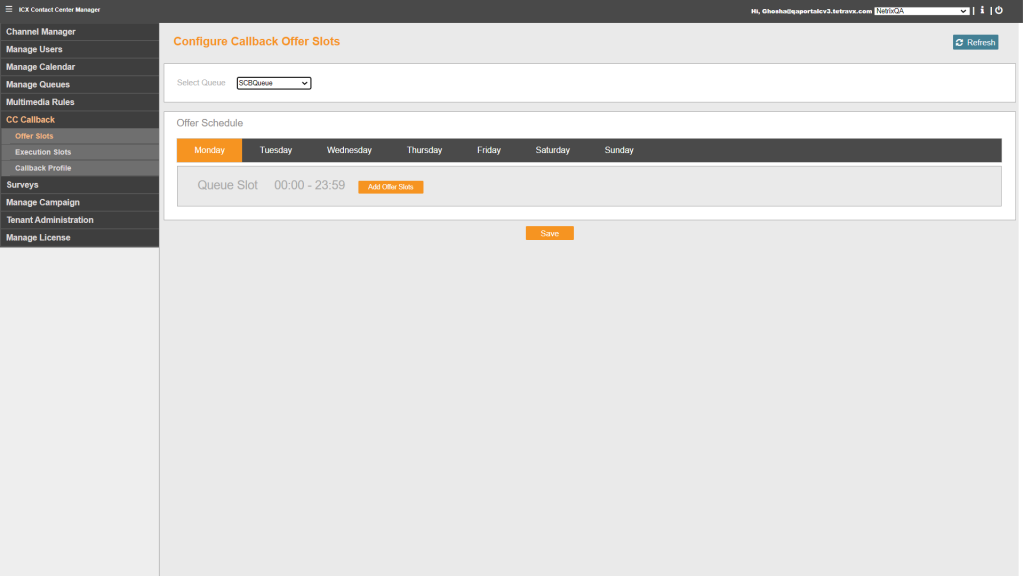
Offered Slots
Offered slot defines the slot in which Callers will be allowed to request callback.

Select Queue from the drop down for which you want to set Callback offered slots.
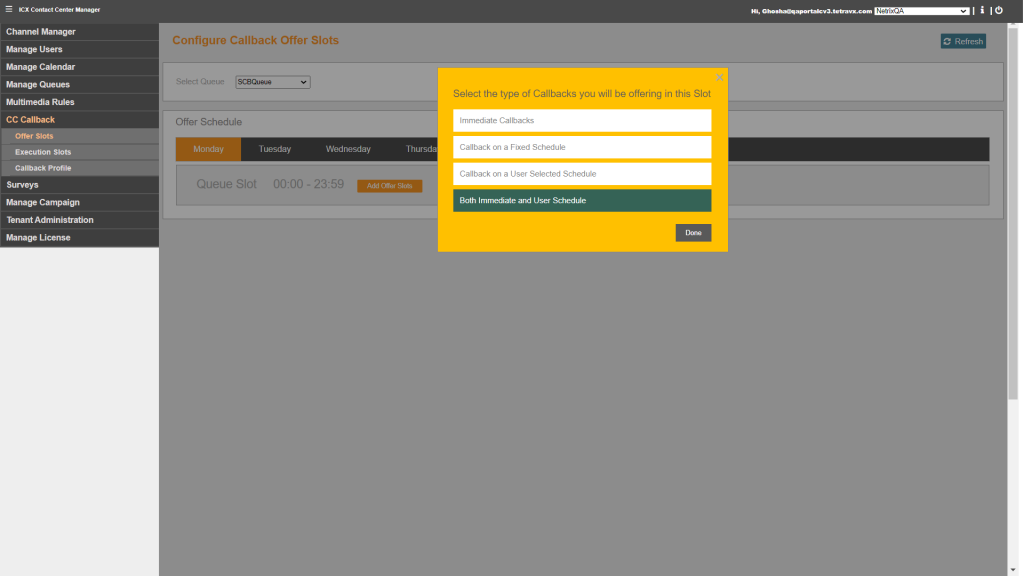
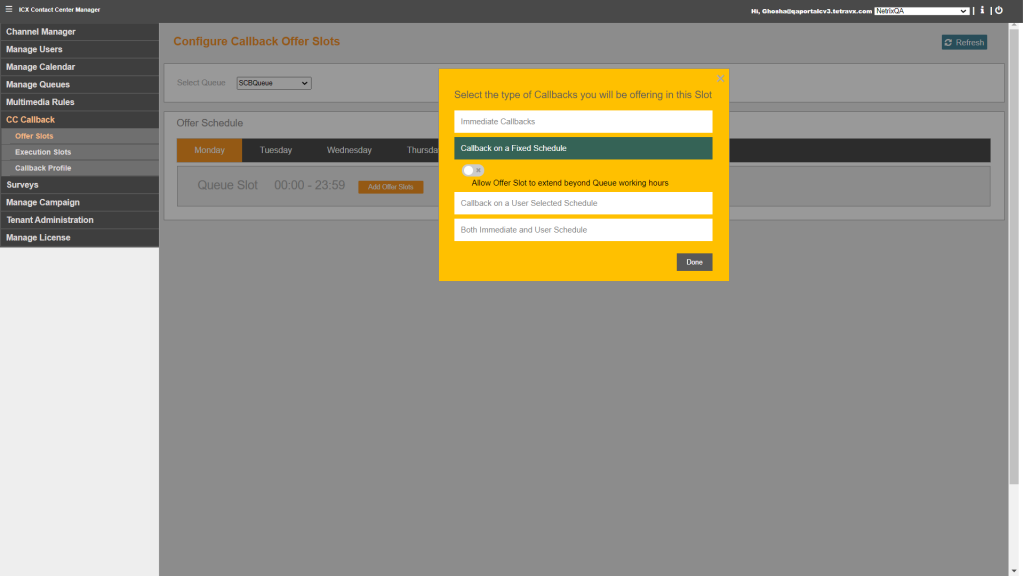
Click on Add Offered Slots button, select type of callback to be offered to caller and set slot. This slot will be allocated to offer the callback service to caller.
Types of Callaback:
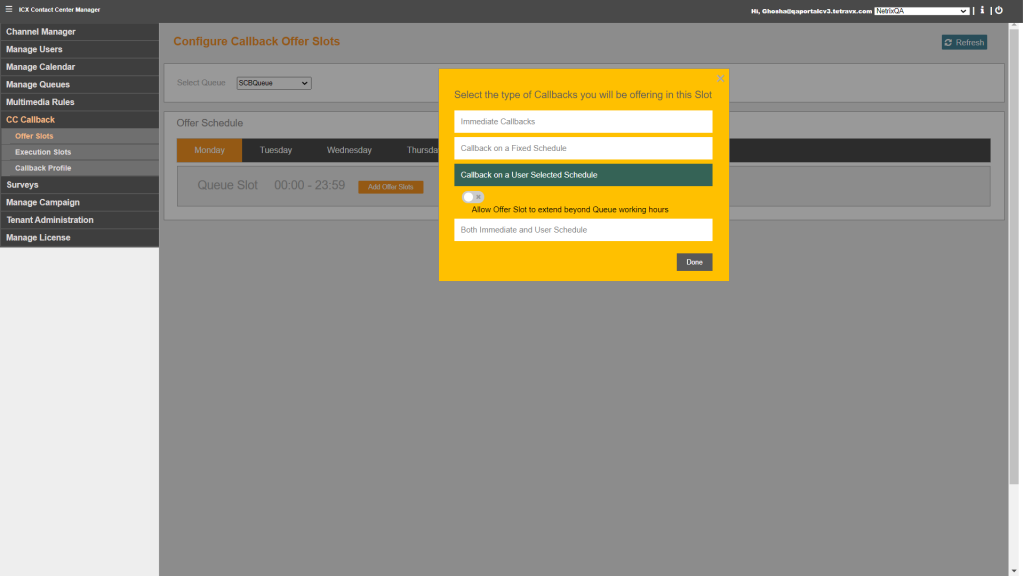
Select the type of Callback, which will be offerred in the selected Slot:
- Immediate Callbacks
- Callback on a Fixed Schedule
- Callback on a User Selected Schedule
- Both Immediate and User Schedule
Immediate Callbacks – Caller will get option to get immidiate callback based on Agent availability.
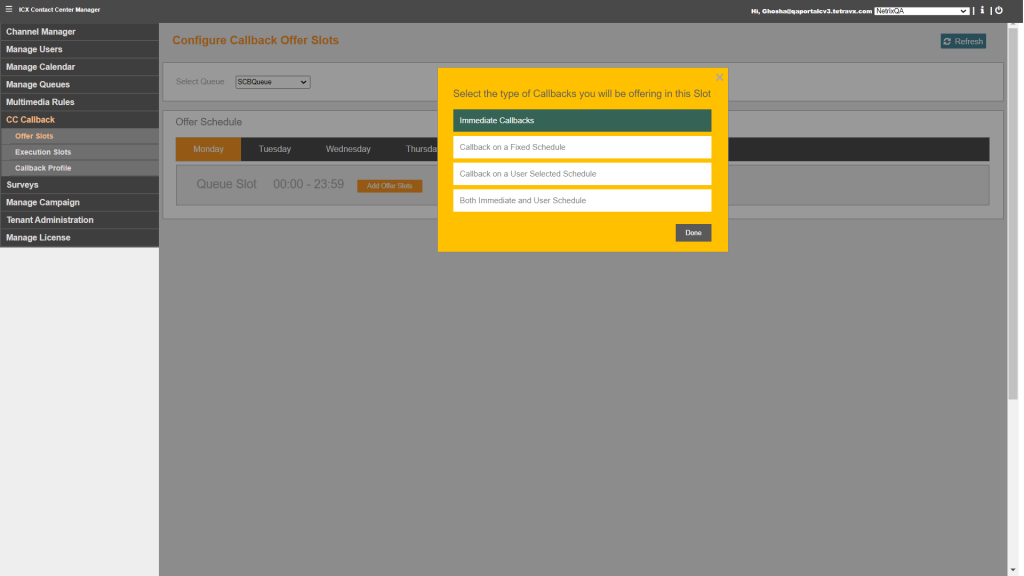
Callback on a Fixed Schedule – Caller will get option to get callback based on the fixed slot. Allow Offer Slot to extend beyond Queue working hours will provide Callback facility even beyond working hours if enabled.
Callback on a User Selected Schedule – Caller will get get option to get callback based on own time Allow Offer Slot to extend beyond Queue working hours will provide Callback facility even beyond working hours if enabled.
Both Immediate and User Schedule – Caller will get option to get immidiated callback or own avaiable time